Thursday, June 30, 2011
Project: Covered Stationery Set
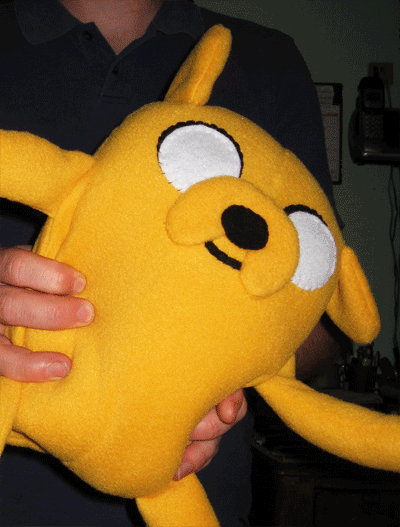
This is a pretty easy project, but it's a fun way to personalize your own notebook, pencil case, and little pouches. I used a regular old composition notebook, that way, when your book is full you can just add in another one and start up where you left off! My aunt made me a sketchbook cover similar to this as a kid and it was fun to have the same cover and be able to replace the book once it got filled up.
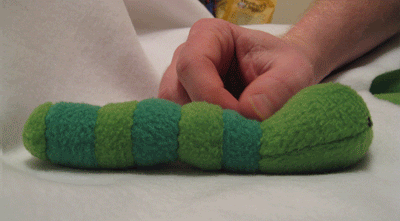
The directions for the mini pouches are easy. Cut fabric strips of both the lining and outside the width you want the pouch to be (plus seam allowance) and then make them twice the height you want plus a flap (and seam allowance again). Pin then right sides together and put a loop of elastic on the inside, pinching it inbetween the seam and then sew all around the outside, leaving a small hole to turn through. Turn and press. Then fold up the bottom edge to make the pouch and sew all the way around, sew on a button, and done!
For the pencil case, use this super dooper tutorial at Skip to my Lou.
For the book cover you're going to need to measure the dimensions of your book, the full width (that means both front and back cover and spine) and height. Add seam allowance to this plus like 1/8 inch for ease of movement, trust me, you want this snug but not impossible to slip the book into! Also measure how deep you want the interior flaps to go on the inside of the covers, the longer this is the more securely it will stay on your book. Now cut the full dimensions of your cover out of lining and outside, the flaps out of the outside material, and elastic slightly less than the height of your book. Then sandwich the pieces together so that the lining and cover are right sides together and the flaps are inside the sandwich with their right sides facing the cover. The elastic needs to go between one of the flaps and the cover. Pin together and sew around the outside, leaving a hole to turn through, and press. Then you can top stitch all the way round really close to the edge (it will get tricky around the elastic part but just stretch it out of the way if you need to). Then slide your notebook into it!
I drew up an illustrated instruction sheet for this project but I lost it somewhere! If I find it I will post that up here to make the instructions clearer!
Wednesday, June 29, 2011
Breaking News!: Panda Watch 2011
“We now go to Brian Fantana, with a Channel 4 News exclusive. Brian.”
The zoo's red pandas, Leafa and Tae Bo had a baby! The little cub was born on 6/12/11 and seems to be healthy and doing well. To keep from stressing the mother, the zoo hasn't confirmed the gender of the baby yet.
I can't wait until the little guy (or gal) is on exhibit! ^____^
“Great story, Brian. Compelling, and rich.”
Adventure Time Week: GIVEAWAY! - CLOSED

Here's the moment you've all been waiting for...The GIVEAWAY!
I'm giving away 3 of my projects this week to you, my lovely readers!
In 3rd place you get the fuzzy little buggy!
In 2nd place you get the adorable inch worm!
All you have to do to enter is:
- Be a follower of The Cute Octopus blog.
- Leave a comment with your favorite Adventure Time quote.
- And leave an email address or way of me contacting you if you win!
Contest is Closed.
Adventure Time Week: Awesome Hat!
Yes, this hat IS awesome. Every adventurer in the Land of Ooo needs a stretchy companion and an awesome hat.
To make the hat I used this tutorial and pattern. It was super easy and worked out pretty well, just note that if you have a large-ish head you might want to increase the pattern size just a smidgen. Or, if you're too lazy for that, win one!
I used white anti-pill fleece and self-lined it so it is VERY warm! I don't think that I would want to wear this around in the heat of summer! I also added velcro to the straps to attach it to the head. Use it to protect your lush locks from the dangers of Adventure!
Tuesday, June 28, 2011
Monday, June 27, 2011
Adventure Time Week: Gunter!
Oh yes, he's pure evil! But you wouldn't know it from looking at him! Didn't this guy turn out the absolute cutest?!
It was pretty fun coming up with the pattern for this one, I just cut up some paper, taped it together, decided it would work, and then went to town! The hardest part was getting the beak just right.
Gunter's belly is super fuzzy too because I didn't have any cream colored fleece, but I think that the faux shearling looks just as nice!
I'm really glad that this one turned out so well since I gifted it to my brother (who also loves all things Adventure Time!) Stay tuned tomorrow for another plushified version of one of your favorite characters!
Friday, June 24, 2011
Adventure Time Week: Inch Worm
And here is the last guy I made from the credits (yeah, I know there are butterflies too, but they are lame)
To make the pattern I did a really small version of the mouse pattern (for the head) and added a shank to make it a lightbulb shape, and then added stripes that I had sewn into a cylinder. Adding the face at the end.
I wish I would have had some wire on hand to stick inside to make him poseable, oh well, maybe next time! He can still inch around if you puppet it!
Tomorrow you'll get to see my version of the "the most evil thing in the world" of Ooo! (Any guesses on who it is?)
Thursday, June 23, 2011
Adventure Time Week: Little Bug
The next little dude in my Adventure Time week is the lady bug from the credits.
I used the same pattern for him as I did with the bee, except I only cut 2 pieces for the body instead of 4. I then cut a circle for the underside of the body instead of making it round. I sewed the legs and antennae into the side seams and then added the details to the body afterward.
This cute, pocket-sized companion turned out extra soft for some reason. His fuzzy legs tickle when he crawls over you!
Stay tuned for the last creature from the credits (bet you can't guess who!) and then some even more exciting plushies inspired by the show!
Wednesday, June 22, 2011
Adventure Time Week: Cute Bee
If you have ever watched Adventure Time all the way to the end, you've most likely watched the credits and listened to this little ditty. I thought that the critters that crawl past the screen in the credits were super cute, so I decided to make them!
First we have the bee, key attributes: cute, round, and yellow. To make him I used my "Bouncing Belly Button" mouse pattern shrunk down to about 80%. I attached the little legs inside the seams of the body and when the body was finished but unstuffed, I then sewed on the details in fleece and felt.
Tuesday, June 21, 2011
Adventure Time Week!
Howdy everyone! I'm back from my Texas work trip, (and man, it was a LOT of work!) but it was also a wonderful adventure. In fact, you could say it was an ADVENTURE TIME!
This week I'm going to be sharing some plush related to the Cartoon Network show "Adventure Time." I might also cap off the week with a totally sweet contest and giveaway! Tell all your friends, it's going to be totally ALGEBRAIC!
Thursday, June 2, 2011
Elastic-Waist Sundress Pattern FOUND!
So, I was looking at some patterns in my stash and came across this one (ok, actually the "Stitch 'n' Save" version of this pattern, but they are exactly the same), and thought, what if this dress had plain straps instead of a ruffle and the skirt was a little less flouncy? It would look a lot like that Old Navy dress I was talking about, right? It even has an elastic waist and everything!
My work trip is fast approaching and I haven't accomplished even close to what I was hoping to, but maybe when I get back I'll have time to whip up one of these babies...after the million other projects I have planned! I went shopping with my mom to Joanns and Hancock Fabrics over the holiday weekend and I bought way too much! $1 pattern sales! $1 a yard fabric! 50¢ a yard fabric! Oh my!
I picked up some knits for $1 a yard and two knit patterns to try, I haven't sewn a knit in a long time, and remember getting frustrated with it on my regular sewing machine. I don't foresee a serger in my future either, anyone have any tips on sewing knits on a "straight stitch" machine? I have heard about people using loose, long length straight stitches, or using the zig-zag or stretch stitch, do you use a special technique? I'm all ears! :D
Wednesday, June 1, 2011
New Look 6457: Complete!
Hey guys, remember this?
I actually finished this dress a few weeks ago, but haven't taken the time to post about it. Yeah, I'm lazy :-p
Subscribe to:
Comments (Atom)


