Friday, September 26, 2014

Custom Order: Octopodes in Love

I recently completed a custom order for two reef octopuses, and I think they turned out absolutely adorable!

Have you ever seen octopodes in love? These two smitten cephalopods have eight arms each, that's a 16-armed hug! Could that be a world record?

These soft, squeezeable companions are excited to snuggle with their new human pals too!


Tuesday, December 4, 2012

Mouses, Mices, Meeces!

Just showing off a couple of mice made for an old friend. Make your own with the Bouncing Belly Button Mouse Pattern!

Thursday, November 29, 2012

Handmade Christmas: Chickies


Hi guys! I'm re-promoting this post I wrote much earlier in this blog. I thought these little guys could make cute stocking stuffers! You could also make them in different colors with circles around their eyes to make cute mini owls. Instructions are below the break!

Wednesday, November 28, 2012

Tip: How to Shine Dull Plastic Eyes

I found out this tip while on vacation. Sometimes micro-scratches from daily wear and tear will dull a stuffed animal's eyes, but I got sunscreen on one of my plush's eyes and the compounds in the lotion dulled the surface. I used a nail buffer by Revlon, the Crazy Shine Nail Buffer, you can get at Target or most drug stores. 


Buff the eyes carefully with the grey foam back of the buffer in a circular motion, this will "roughen" the surface and it will look satiny or even velvety. Then, buff with the white side using the same motions. This will restore the shine to your plushie's eyes!

I would recommend testing this in an inconspicuous area of the eye, maybe near the fur, before buffing the whole eye, just in case this method doesn't work with the particular type of plastic you have. I'm so glad I found out this tip that turned my toy's dull, dead eyes back into shiny, lively ones!

Tuesday, November 27, 2012

Introducing: The Bouncing Belly Button!

Hi guys!

Long time no see! I'm currently working on some small, beginner-level plush patterns to put in my Etsy store. I'm hoping that they will be useful as quick, easy stocking stuffer gifts for those of us who are still searching for the perfect thing for that special someone!


My first release is the Bouncing Belly Button Mouse Pattern.  The pattern is illustrated, so it is very easy to follow along. I can make one of these guys in about an hour-or-so. With a little time and practice you could have a whole basket full of these guys made in time for the holidays!

There are FOUR different sizes included, Mini (80%), Small (90%), Medium (100%), and JUMBO (110%)! Stuff a mini with catnip for your kitty or make a Jumbo as a fun toy for a toddler!

I hope to be publishing some more easy-level patterns before the month is over, so keep checking!

Tuesday, August 21, 2012

Lesson: Correct Measurements Make a BIG Difference!

As some of you guys might know I'm in "Wedding-mode" for the next year or so as I plan my wedding! Anyway, I went in to try on some wedding dresses and my consultant took my measurements. Measurements that are approximately 3-5 inches SMALLER than the measurements I thought I was. I was shocked! I have lost some weight from being sick, but I usually try to take measurements before my projects, so I didn't think I would be off by THAT much.


All of a sudden things are making a lot more sense, why I'm having weird fitting issues with EVERYTHING, why things turn out too big even when I calculate my size using finished measurements.  Since I've gotten my TRUE measurements taken the 3 dresses I've made are the best fitting I've ever created.  Let this be a lesson for all of us: Get your correct measurements taken, it makes a BIG difference!

I haven't been too photogenic recently, but I'll hopefully be re-wearing my recent projects soon and I'll convince the fiance to snap some pictures! The patterns I used were Burda 3/2011 #109 and Butterick 5601, both patterns that I would recommend and would like to use again. I also think that I'll tackle Colette Chantilly this weekend before summer slips away from me!

Thursday, July 12, 2012

Reader Submission: Jake!

Have you downloaded your free Jake the Dog pattern yet? France did, and sewed this huggable, lovable Jake for a birthday party! Isn't he cute?


I'm currently working on making some easy, beginner level plush patterns for the newbies out there.  Head over to my Facebook page to tell me what you want to see!

Thursday, June 21, 2012

Pattern: Jake the Dog

Hey guys!

I'm nearing 40,000 pageviews and thought it was about time I gave away another freebie. I've added my Adventure Time Jake the Dog plush to the "Patterns and Downloads" page.  There aren't any instructions included with the .pdf, just the pattern pieces, but you can probably figure it out pretty easy.

Jake the Dog by Morgan

When you print the pattern I recommend setting it to 100%, not "fit to page." The pieces should fit together like a puzzle and tape the pages together before cutting out the pieces. I also recommend opening it in Adobe Reader and not GoogleDocs.

Make sure you add the amount of seam allowance that you feel comfortable with.  I usually add about 1/4" to 3/8". Sew the tail first, then insert it into one of the darts in the body (this will become the back), sew the rest of the darts.  Then sew the arms and legs, turn and stuff.  Then pin them inside the body in the orientation you want (look at my pics to get an idea) sew the body closed, right sides together, except for a small hole, turn and stuff.  Sew the hole closed.  Sew the ears, jowls, and nose, turn and stitch closed (no stuffing).  Cut the eyes and mouth.  Then sew on the face.  I sew it all by machine except for the closing and adding the face/ears.

For the body I use golden yellow anti-pill fleece (you can get this at most craft/fabric stores like Joanns) and also a very small amount of black anti pill fleece for the nose and mouth. For the eyes I use black and white felt, but fleece might even be better. And I stuff him with poly-fil stuffing. 

I would love to see your creations!  The Jake pictured above is made by one of the followers of this blog, isn't he super cute!


You can email me using the button in the side bar if you have any questions!

Tuesday, February 28, 2012

Project: Fabric Stamp

I've been sewing a lot of dresses lately and I thought it would be cool to make a label for my own "clothing line" to sew into my projects.


I used a linoleum block and a lino cut set from my brother and carved out this stamp in an evening.  I've been using acrylic paint with fabric medium in it to do the stamping.  I mix it up and then sponge it on the stamp.  Then I lay the fabric on top of the stamp and burnish it lightly with the back of a big spoon. Then I peel off the fabric and let it dry.


I think that plain cotton worked the best for transferring the image, but I made several in t-shirt knit so that the edges won't fray when I sew them in my projects.

What do you think!

Wednesday, February 1, 2012

Gleb the Creature

Here's another recent custom job I did for my brother.  He is an art student at university and this is an original character he came up with.  His creation is named 'Gleb,' I'm not sure what kind of creature Gleb is, but he sure is cute!

If you have an original character and would like a plush made, email me using the link in the sidebar!


Tuesday, January 31, 2012

Jumbo Bat!

I finished a custom order last night, Kandice wanted a big brown bat with a cute face and I was happy to oblige! If you want a custom order, all you have to do is email me or message me on Etsy (links are in the sidebar). I am happy to discuss custom order options and develop new designs!

I am also (slowly) working on making a downloadable .pdf pattern for the penguins.  I would make it available for purchase on my Etsy for a small fee.  I am getting burnt out on making them but still want people to have the opportunity to have one of their own! I am also thinking about making a penguin kit that would come with all the fabric pieces cut out, all you would need is the stuffing, needle, and thread.  Would you be interested in something like that?


Monday, January 23, 2012

Finished Project: Colette Pastille Variation

Yup, I made another one! But I bet you wouldn't recognize it as Pastille if I didn't tell you.


I took the Pastille pattern that I fitted for my last dress and made a couple of modifications.  First of all I took off the cap sleeves, I did that by just drawing a new outline for the armscye.  I should have also taken the outer shoulder down about 1/2 inch but I didn't. I'll do it next time though.


Then I drafted a peter pan collar by following Caitlin Clark's tutorial (Caitlin from Colette Patterns) here: The Story Girl.  I then added contrasting piping to the edge of the collar and to the waistline.  This is the very first time I've ever used piping.  I think it looks really cute!


I also modified the bust darts using the method Gertie shows here: Gertie's New Blog for Better Sewing. I fit this part to my body as I sewed it but I forgot to take into account that the skirt would pull the bodice down slightly so I feel like the darts are a little low, something I'll fix on my pattern for the next time.


On the back I extended the waist darts about 1.5 inches and I think it took out a lot of the excess fabric that was on my earlier version. (Again, ignore the wrinkles! I was sitting on the skirt at work) It's still a little weird back here but I've given up on caring!


Finally, I added a dirndl skirt. for this I just cut rectangles the width of my fabric by 23" inches high and sewed them together and gathered to attach to the bodice.  I think this version turned out pretty darn cute! Now I'm debating whether I want to make another one or to move on to my Colette Peony I just got in the mail...

Tuesday, January 17, 2012

Finished Project: Colette Pastille

My mom got me the Colette Sewing Handbook for my birthday in October and I have been itching to make something ever since! After the hustle and bustle of the holidays died down I decided I would tackle the Pastille dress.


Pastille is a basic sheath dress, its details are a sweetheart neckline and horizontal pleats in the skirt. I used this CRAZZZYYY cotton from Joann Fabrics, it was only $2 a yard and I wanted something cheap for my first go-round (It IS a quilting cotton, but I think that its weight and texture are ok with this pattern, plus, I'm one of those kinds of people that doesn't really care about the stigma of quilting cotton).


I also decided that I was going to do this 100% the "right" way, no shortcuts!  So I made 3 (THREE!) muslins before sewing the actual dress, finished all the seams on the inside, and did all the appropriate thread tracing/pressing/busy work.

The pattern is sized 0-18, I made a 8, but graded down to a 6 in the hips. The instructions were very easy, I hardly needed to even follow them! My major complaint is the fitting issues I faced with this pattern.  I was really hoping that this would be an easy fit, since Colette Patterns has a pretty good reputation but I had major issues with the back. It was quite baggy and I had to do a sway-back adjustment, something I have never tackled before! I went on the Colette Patterns Community Forum and learned a lot of other ladies were having this problem too. I think I have the back under control now, but it was still an unexpected obstacle.

I shortened the waist 1" first.  Then I made a 1.5" sway back adjustment. My method is delineated in the graphic below. I also graded to a 6 in the hips.  If I were to make this pattern again (which I probably am) I think I am going to lengthen the back waist dart to remove some extra fabric in the back, lower the bust darts just a hair, take the waist down just 1/2" or so (I think I took it up too high originally), and remove the cap sleeves since I think that the shoulders are too big for me anyway. I also see some bagginess on the sides of the dress, maybe I need to make a size 6 and do a FBA so that the dress fits my ribcage better? IDK. Also, I notice that my waistline pulls up at center front, what's doing that?


I liked that it was a simple, easy dress to put together, and that it is "no-nonsense," there aren't a lot of frills or design additions. That way it lends itself to be remade again and again, with the addition of your own details, to make a whole closet of dresses!

I think I am going to sew it again, I really want to refine it into a "go-to" pattern that I can rely on to fit every time.  I would certainly recommend it to others, but I HIGHLY RECOMMEND sewing a toile/muslin first, since the back seems to be an issue for most sewists.

Monday, December 5, 2011

Project: Slouchy Hat

Long time no see! I know it's been a month since you've seen me but I haven't been loafing around...well not the whole time anyway.  I'm working on some new plushies that should be showing up in the new year and lots of little projects for Christmas and the like.  I also bought myself a Nikon D5100 and have been having fun playing with my new toy :D It's been nice to have a little break but it's about time to get back in the swing of things, huh?


While I was MIA I made this hat (and another one just like it in wine red).  It's crocheted using Vickie Howell's Urban Jungle pattern that you can find here for free.  It is made from the brim up, which is a little bit out the ordinary for most crochet hats, every one I've made until now has begun at the crown.  The band is made sideways in a nice faux-rib that isn't super stretchy but gives that attractive knit-look.  It's super easy and doesn't take too long.  I made my second one in an evening.  I used Lily Sugar n' Cream for both hats, this one is in Robin's Egg Blue.  It took about 1.5 balls of yarn, so make sure to buy 2 in the same dye lot.


I definitely recommend this project, I've been on a crochet kick recently and this is the project that got me "hooked" again (bad pun alert!)

Do you have any hobbies that seem to come and go with the seasons?

Friday, November 4, 2011

Baking FAIL

Sooooo, I was trying to make these cute bear breads:


This is how mine turned out, and these are the BEST ones:


But sometimes, even failures can make a great sandwich!


Wednesday, November 2, 2011

Project: Red Panda Halloween Costume

Howdy dudes! I meant to post this up sooner to be more in the Halloween spirit but I got sick and it got forgotten until today.


For Halloween I made my own red panda costume.  It was quite a bit of stuff to make so I took a "vacation" from my Etsy store and I am glad I did.  I was still working on sewing the last bits of my costume up until the morning of the Halloween party!


The breakdown:
  • The red panda ears were made from faux fur that I stuffed and sewed on to a headband (which I also covered with fleece to match the vest)
  • The vest was made with a McCall's fleece vest pattern but I added elastic to the back to try to make it a little more flattering.
  • I made the mittens from a mitten pattern from my aunt and I added vinyl stolen from a pair of thrift store faux leather pants to make the paw pads.
  • The red panda tail was hand-sewn from faux fur.  I failed a little at cutting out the stripes and accidentally trimmed off some of the hairs so the stripes look a little blocky. I sewed a loop of grosgrain ribbon to the top and attached it to a belt.
  • I also made the leg covers out of faux fur.  I traced the bottom of a pair of flare leg jeans for the pattern.

I was planning on making a mask, but my first couple of attempts were veering toward dopey/ugly and not cute, so my mom suggested red panda face paint.  I mixed my own colors from one of those cheapo Halloween face paint palettes.  I put "powder" over the top to seal the color and keep it from being all greasy. For the rusty brown I used bronzer, for the black I used black eyeshadow, and for the white I used cornstarch (this was a last minute substitution since the white eyeshadow I bought didn't work)! I also couldn't find any of the costume adhesive to glue on my "sideburns" so I used eyelash adhesive and it worked surprisingly well!

I think all together it turned out pretty cute! I am also super glad that the face paint washed off, I was a little worried I would be going into work with a freaky face! Do you think the red pandas will accept me as one of their own? :D

Thursday, October 27, 2011

Photo: Jake the Dog and Finn the Human!

Check out this trick'r'treater! This photo was sent in by Dennis, one of my custom Jake order customers.  Doesn't his son look adorable!? I'm so glad my Jake can complete his ensemble, after all, who's Jake with out Finn?


Hope you guys have your Halloween costumes in order! What/who are you gonna be?

Tuesday, October 25, 2011

Project: Whoo?! It's OWL that's WHO!

I have a new creation to show you guys, meet Owl! 


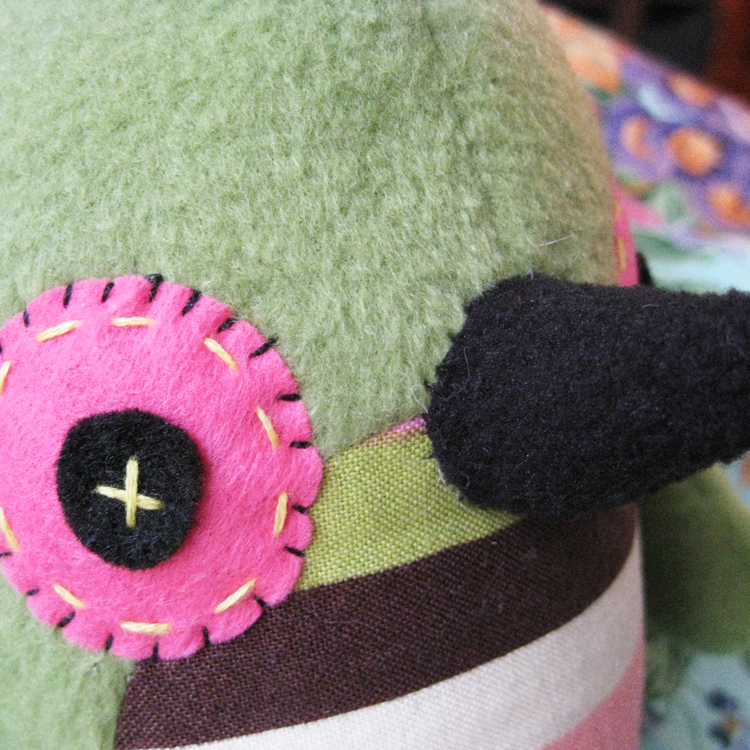
I altered the penguin pattern to be a little shorter and fatter and made this guy. I meant to make him a horned owl but I forgot to put on the little "ear" parts before I sewed him together, oops!


I also tried to make his eyes a little funky, what do you think?  What color owl would you want?


Tuesday, October 18, 2011

Nails: Chrysanthemums

 
Plate: BM 02
Base color: Sinful Colors - Nirvana
Design: Sally Hansen Xtreme Wear - White On
Top coat: Seche

I've taken off this mani after only about 2.5 days of wear. My nails are totally destroyed right now.  I've always had peeling nails but constant nail polishing has really exacerbated the situation.  I've cut them all super short and am going to go au naturale for a while in hopes of growing out some healthy nails.  Anyone know of a miracle treatment for peeling nails?

Monday, October 17, 2011

Three of a Kind

The first (and last) Jakes I've made.  I've run out of the proper color fleece and won't be making any more of these until I find the color again.